 What better time than May is there to begin practicing your chili artistry before the next Superbowl. Well, at least that's my mentality. I admittedly love making and eating chili, but because of that people are always asking me how I make such great chili. So, I'll lay down my tips on how to make some insanely good chili (okay, admittedly, it's probably not insanely good, but I had to work something in there to follow the loose theme of this blog).
Basically, I cook my chili in three stages. You can break them down into two, but I usually make two batches, one spicy and one not-so-spicy to cover everyone's tastes.
STAGE 1: Cook Some Meat
Some people go all out on the special types and cuts of meats they use in their chili, but I like to keep it simple. I use high-quality lean ground beef with 7% fat. You can definitely use beef with higher fat content, but you get about the same taste with leaner meat that is healthier.
Find yourself a good sized pan, chop up an onion (any type of onion will usually do), and mix in a few pounds of ground beef. You can cook the meat and onions with some oil, but I just keep it simple.
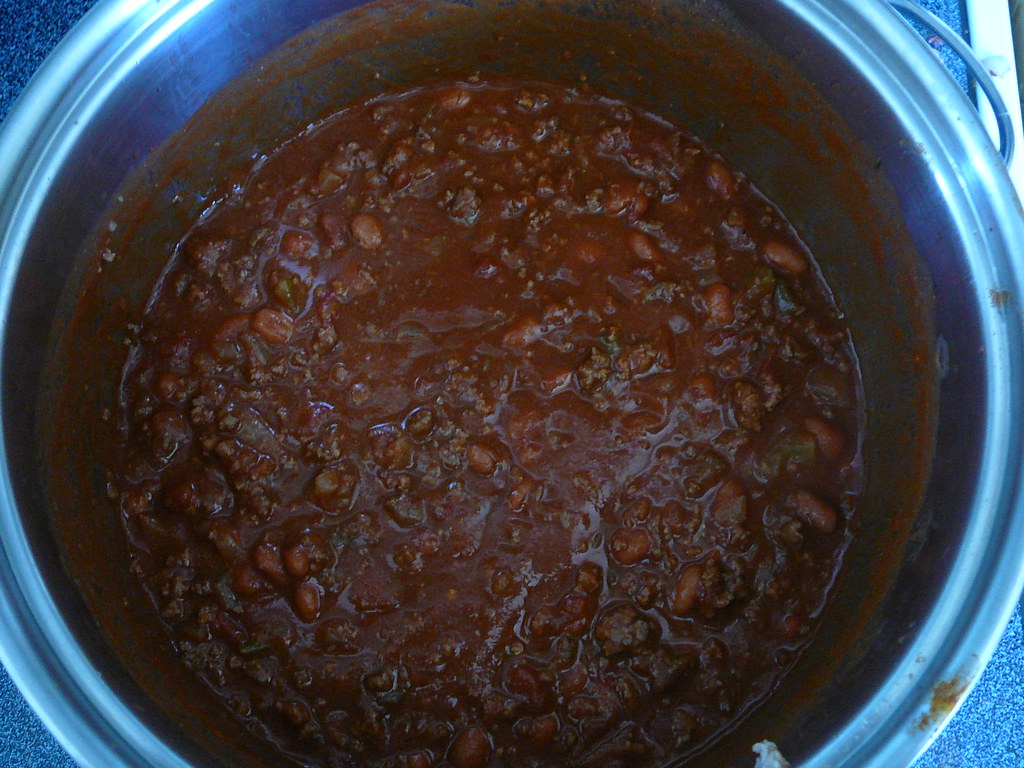
STAGE 2: Meat, Sauce, and Stuff
Once the meat is cooked, you'll want to put it in a big pot with your tomato sauces. The amount of tomato sauce you use is dependent on how much meat and beans you plan to add. For a couple pounds of meat I use about 30oz. of regular Hunt's tomato sauce and 28oz. of chunky tomato sauce. Some people prefer stewed tomatoes over the chunky sauce, but not me. Next you'll want to add some beans. S&W has some good chili beans, which I believe are just kidney beans with some extra flavoring. In reality, just about any type of canned bean will do. I usually use about 30oz. of beans with the previous stated amounts of sauce and meat.
At this point you'll want to cook your chili for about 30 minutes. During this time is when I add some basic seasonings and spices that don't really add too much heat to it. Some seasoning ideas are oregano, ground cumin, mustard powder and/or just plain mustard, Jack Daniel's BBQ sauce, beef botulin, and a nice bottle of Sam Adams Summer Ale. I don't have any specific guidelines on how much seasoning to put in, but the idea in any good cooking is to keep mixing stuff up and tasting it to how everything blends. Also for an interesting twist trying adding a couple stalks of chopped celery to the mix.
STAGE 3: Make it Hot
This is the point where you'll want to separate the chili into the two batches if you want one to be less spicy. Just keep cooking the non-spicy chili for about another 1/2 hour and then let it simmer for a couple hours, while stirring every once in a while.
Now, the main ingredient to making chili hot is of course chili powder. I would suggest using just regular chili powder. You can use habanero chili powder, but I would only use a pinch at most if you want a sharper spice, because that stuff can kill your tastebuds and stomach if used too liberally. Another alternative/additive to chili powder is cheyane pepper, which is usually hotter than standard chili powder, but not as bad as the habenaro.
Once you have the basic spicy flavor I would suggest adding some chopped jalapeños, red pepper (the kind you get at a good pizza place), and some chipotle Tabasco sauce. As always, be careful in how much you add, some of these spices can be very volatile, especially to people with sensitive taste buds. A good way to lessen the bite of the spices is to add some sour cream.
Cook the chili for about 30 more minutes and then let it simmer for a couple hours. Technically it can be served at any point while it is simmering, but the longer chili is left out or kept in the fridge, the longer the flavors are able to develop.
Good luck, and have fun making a nice batch of chili.
No comments:
Post a Comment